
cake would be perfect for a party.

I love Halloween but I’ve honestly never had a party or made any baked goods with it’s theme. I ended up seeing these cute skeletons at our local dollar store and thought they would be fun to pose. They had enough details to look “life” like yet small enough to fit on a cake or work area. (I kept one of mine, and he’s sitting on my computer).


Sir loved this cake! He thought it looked really cool but at the same couldn’t wait to eat it. I used gluten free brown rice krispries to keep it allergy compliant. I wanted the marshmallows to be be extra stretchy so I ended up using some real butter and canola oil, but I’ve used palm shortening in the past with no problems.

The ganache was something new for me. I’ve never tried to make it even though it’s so easy. A ganache traditionally is equal parts heavy cream and dark chocolate. Simply heat the cream to a rolling boil and pour over chopped chocolate in a bowl.

- 1 box (12oz) gluten free rice kris pies
- 1 bag (24 oz) Jumbo Marshmallows
- 6T butter
- 4T canola oil
- 3T cocoa powder
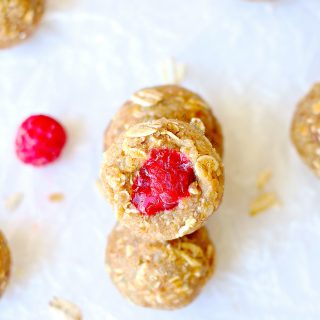
- 1/2 chocolate chips (layers)
- 3/4 cup mint chips
- TOPPINGS
- -1/2 -3/4 cup frosting (optional)
- Ganache
- -1cup heavy cream
- -8 oz bittersweet chocolate
- mini skeletons
- super glue
- tape
- round platter
- parchment paper
- cardboard circle

Skeletons
These are just the poses I chose. You can make anything you’d like. The main skeletons I created were: Drowning, the Helper, Tantrum, Escape and the Eater.

Plan the overall look you’re going for before you start. To created a pose, bend the arm and legs into the position you’d like and add a small dap of glue. Use a lot of tape to help maintain the pose. Let them set up for at least 2 hours. I did them at before bed so they had all night to dry. Randomly choose which body parts you’d like to use and where you’d want them. Details are important. You should curl each finger and joint to make it more life like.

- Melt 11 jumbo marshmallows and 3 T butter in a pan.
- Mix 4 cup of plain gluten free rice krispie cereal.
- Press half into one 9inch pan lined with parchment paper. Use wet hands or parchment paper to press flat and leave a 2-3inch hole in the center.
- Repeat with the remaining half in the other pan.
- Melt remaining jumbo marshmallows and 3T butter, 3T oil.
- Add in 1/2 cup chocolate chips melted marshmallows and mix until smooth.
- Slowly add in 3T cocoa powder. You may need to add more oil if marshmallow becomes too thick. Add in remaining rice krispies from the box, approximately 5 cup
- Press half mixture on top of one of the plain rice krispies pan. Try and create the same size hole in the center. Use wet hands to flatten and make as level as possible. This is the bottom layer of the cake.
- Reserve approximately 3/4-1 cup chocolate krispies. )This will be used to create the hill.)
- In the second pan, fill in the center of the plain rice krispie (with chocolate krispies) to the level of the plain rice krispies.
- Pour and press remaining chocolate krispies, as level as possible. Again, leave a 2-3 inch circle (this is where the Drowning skeleton will go). Build a small hill with the reserved rice krispie next to the center hole (this is where the Helper skeleton will go). This is the top layer of the cake.
- Allow the cake to cool before trying to stack or else it will be too soft and fall apart.
- While the cake is cooling trace and cut a circle of cardboard that fits the pan or is slightly smaller in diameter. This will make it easier to move the cake.
- After the cake cools, transfer the bottom of cake (keeping the parchment paper on bottom) to the cardboard.
- Add your desired “surprise” filling into the center of cake.
- Place the top layer on on (remove the parchment paper from the bottom). Gently press and reshape to fit together.
- Lightly frost the entire cake with a thin layer of frosting to fill in any gaps and makes the ganache appearance smoother. Place cake in refrigerator. There are 2 really good reasons you need to do this step. First it will help the frosting set and then you can smooth out imperfections. Second, it make the cake cold so it won’t melt when you add the hot ganache. If you skip refrigeration, you run the risk of the frosting melting and the ganache will fall off and leave gaps. It may also melt the cake 😮
- Chop chocolate with a serrated knife into shaving side pieces. To help contain the mess, place parchment paper on the cutting board first. One less thing to clean.
- Microwave cream in a bowl until it just boils. Stir and microwave again until it boils. Carefully pour hot cream over chocolate in the bowl. Allow to sit unmixed for 5 minutes.
- Gently mix to emulsify cream and chocolate. Mix until combined and smooth. The ganache needs to cool before you can use it or else it will be too thin. It should be cool enough to touch without burning your finger and start to thicken. The time will vary depending on the temperature of your house. Mine took at least 1 hour for it to cool and thicken.
- Take cake out of refrigerator and place on a platter. Slowly pour over the cake starting around the hole in the center. Use spatula to help even and spread ganache.
- Once the top is almost covered, slowly ganache closer to the edge on one side. Use the spatula to help slow the drips and spread to cover any spots. Continue to pour until cake in entirely covered. (If a large puddle occurs on one side don’t panic, simply use the spatula to help ‘recycle’ and move the ganache to an area that needs it.)
- Once cake is all covered, clean up edges of platter and place in refrigerator for 15 minutes to help cool the ganache. The ganache will be soft, but this is the time to place the skeletons.
- Carefully place body parts and skeletons. This cake is all about details, so watch the angles you place arms and don’t forget to make claw marks in the ganache with the hands.


wonderfully creative.I love chocolate .
Thank you! The ganache frosting is a rich dark chocolate.