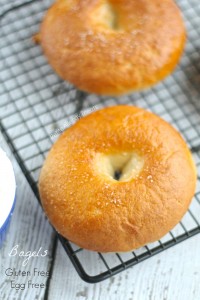
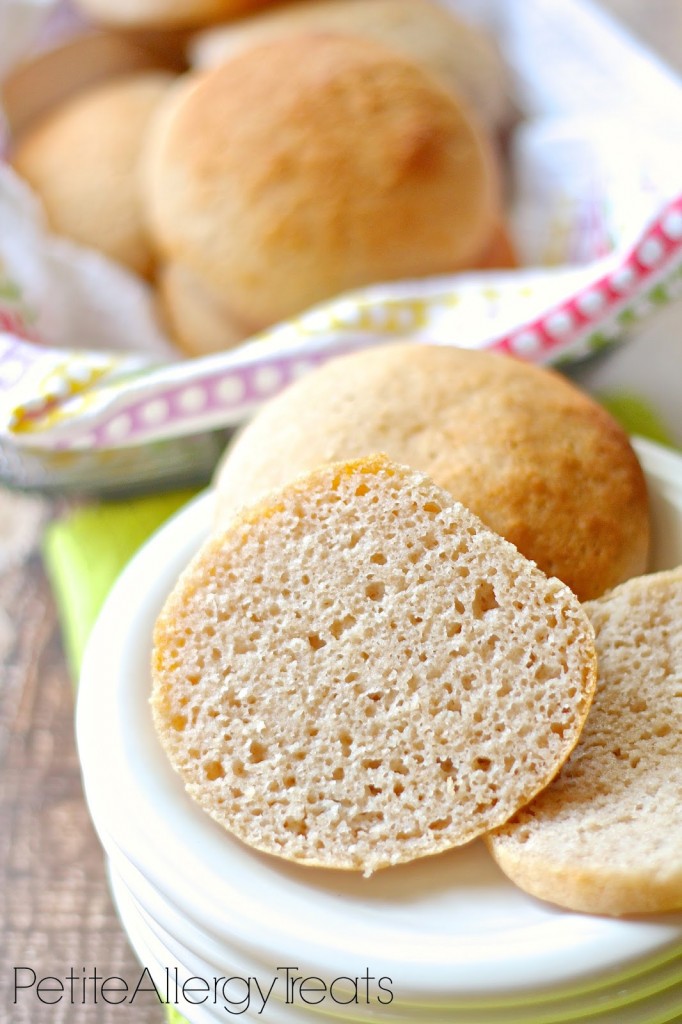
If you love bread you’ll love these Gluten Free Egg Free Bagels that are also Vegan and dairy free. Food allergies make it impossible to find an egg free bagel until now. These are soft and chewy just like the bread you miss.

Happy New Year to everyone! I love how each year it feels like we’re given a clean slate to start over and improve areas in our lives. Of course, we should reaaallly be doing this everyday, but we’re busy with life, right? Hopefully you’re off to a good start to the year. Anything special on your list of resolutions?
My typical thoughts around this time aren’t really resolutions per se but are always focused on eating better and improving health for me and the family. The health factor always leads to exercising to get in better shape. So I’ve decided, (sort of) to train for another half marathon. And by train, this time I’ll actually run on a schedule instead of just deciding to run once a week a hope I make it back home walking and not crawling…
- Chewy and dense, you'll never know these bagels are gluten free and egg free. PetiteAllergyTreats")
Running all those miles over the summer seems so long ago but I distinctly remember the post run carbohydrate cravings. All I wanted was bread. Fresh warm bread from Panera, actually. But not just any bread. BAGELS. Lots and lots of bagels.
Before going practically gluten free (I cheat a bit here and there) for my son, my absolute favorite food in the entire world was a bagel with cream cheese. Completely nutritionally void but oh so chewy, creamy and satisfying. Apples were my craving with pregnancy with Sir but pile on the bagels with Mr. Naughty’s pregnancy.

Fun fact: I once ate 4 bagels with cream cheese while in college for a free ‘snack’. (Poor college student = not sure when the next good meal is coming.) It was our reward for volunteering time at out local PBS television station auction. Needless to say this little piggie had a tummy ache the rest of the day.

Now that I’ve explained how much I LOVE bagels, you can appreciate how much time I’ve taken to work on these. I’ve had several fails… several successes… but I wasn’t happy until I could make them easy enough (and seem like the real deal) to share with all of you who also are missing bagels on a gluten free egg free diet.
These bagels take some time, but then again all good things do. I suggest trying a single batch first. After you can’t live without them, set a side some time over the weekend and make a double or triple batch to freeze.
 - Chewy and dense, you'll never know these bagels are gluten free and egg free. PetiteAllergyTreats")
I hope you love them as much as my kids.
Gluten Free Egg Free Bagels (Vegan Dairy Free)
Author: Laura @ Petite Allergy Treats
Ingredients
- 3½ cups gluten free all purpose white blend
- 1¾ cups dairy free milk of choice or water
- 2½ tsp yeast or 1 packet
- 3 tsp guar gum
- 2 T oil
- 1 tsp salt plus extra for top
- 1 T sugar
Instructions
- Heat liquid to 100 degrees. Add yeast and sugar and mix and allow to sit for 5 minutes.
- In a separate bowl mix flour, gum and salt.
- In large bowl combine liquid and oil. Gradually mix in all the flour mixture by hand to avoid big lumps. Mix until all incorporated and smooth.
- Use a large cookie scoop or spray a ½ cup to scoop the dough. With wet hands form dough into a ball and use a finger to poke a hole in the center. Gently shape into bagel form by expanding the hole. Place on a individual piece of parchment paper on a baking sheet lined with parchment paper. (see pic)
- Spray tops with oil, cover with plastic and allow to rise in a warm place for about 20 minutes. (Don't allow to double in size or else it will lose its shape and fall apart in the bath.)
- Bring a large pot of water to a rapid boil. Gently drop a max of 2 bagels in the water and boiled each side for only 30 seconds each side. Remove individual parchment paper pieces and place back on baking sheet. Sprinkle with salt.
- Bake at 450 degree for 14-16 or until golden brown.
Notes
Be careful moving bagels to and from the water. The extra sheet of parchment paper makes it easier to move and comes off easily after boiling. The water should be a rapid boil and only let them sit for a short while on each side or else they will absorb too much water and become soggy. If you can, allow your oven to preheat at least 20 minutes prior to baking. These freeze extremely well and can be used for sandwich bread.
Some other things you may like:

Gluten Free Panera Cinnamon Crunch Copycat
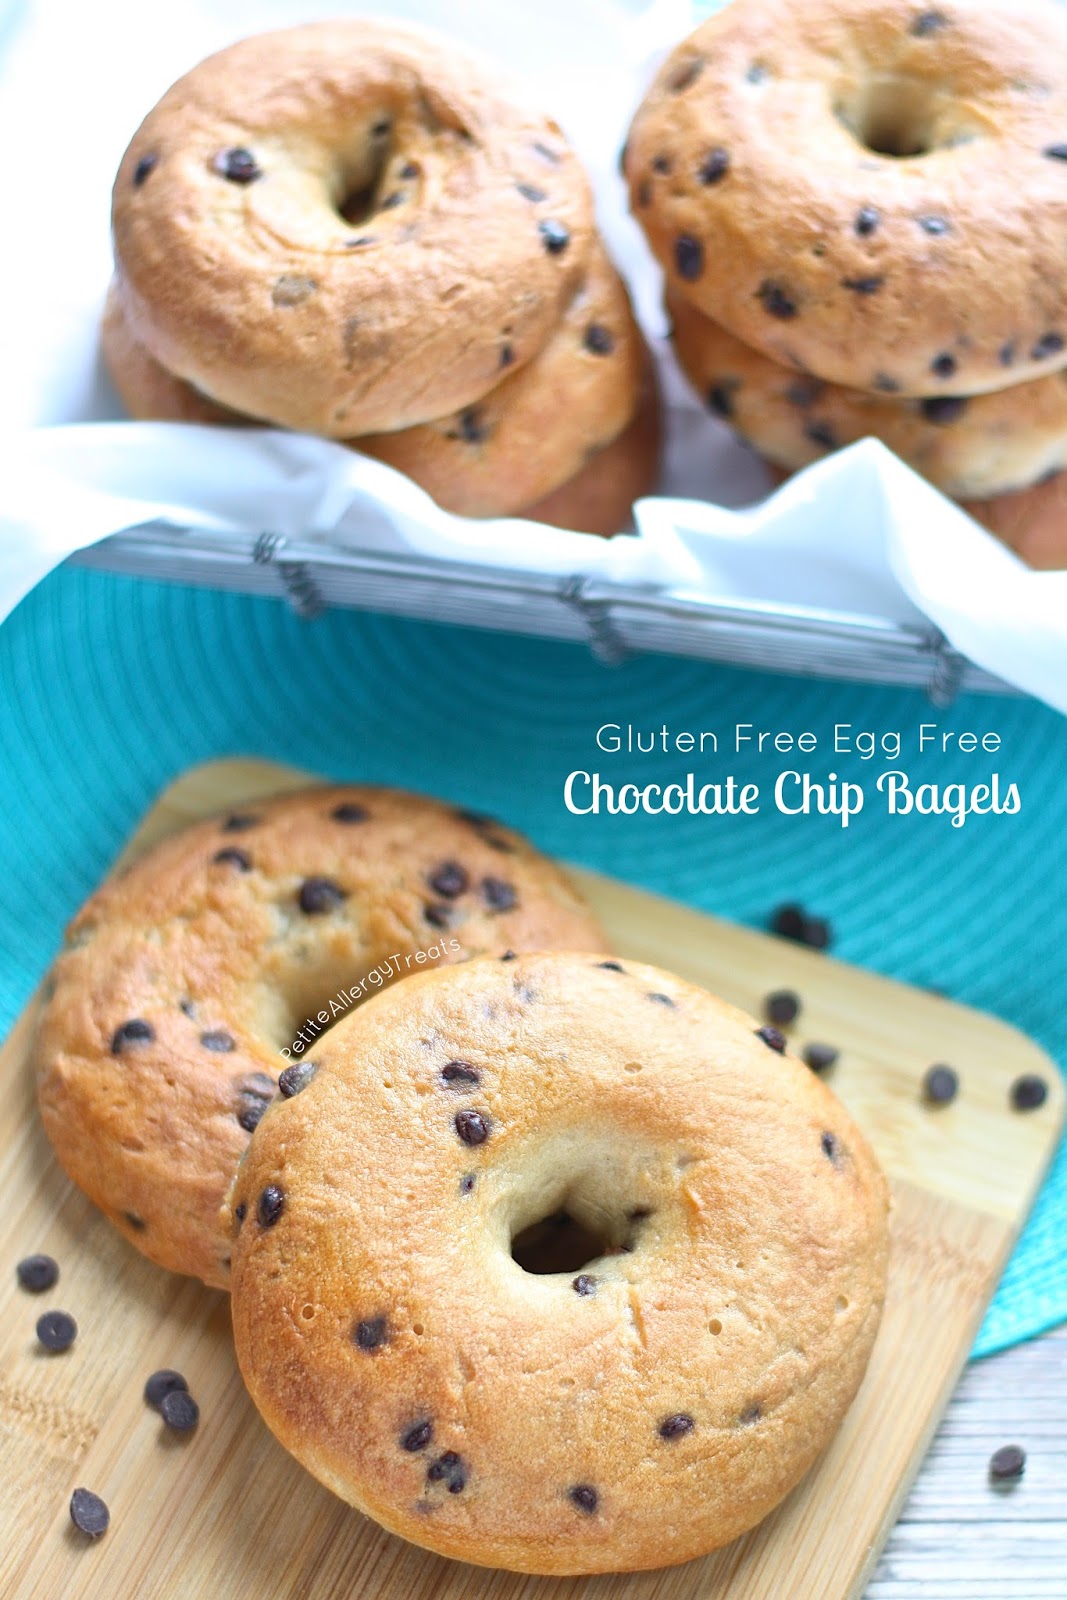
Gluten Free Chocolate Chip Bagels- dairy free egg free Vegan
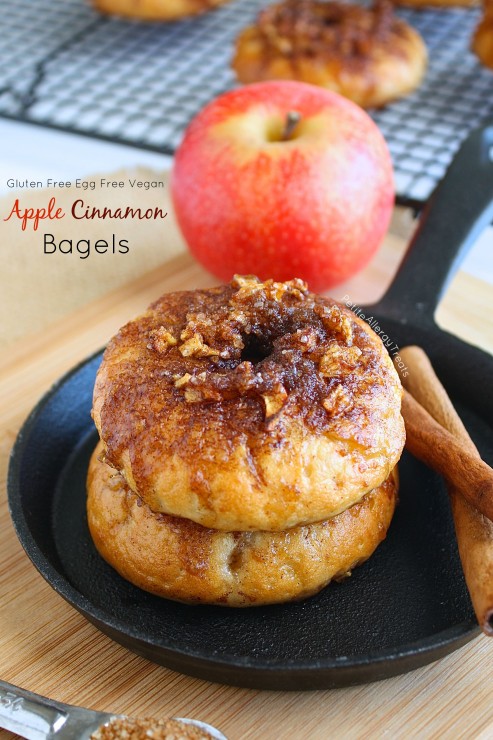
Cinnamon Apple Bagels- gluten free egg free Vegan

Gluten Free Vegan Garlic Crescent Rolls
- Chewy and dense, you'll never know these bagels are gluten free and egg free. PetiteAllergyTreats")


If my GF All Purpose Flour Blend has guar gum in it already, do I still need to add that in or can it be left out? Thanks!
Hi Mary,
Thanks for commenting! It depends… If you know the cup to guar gum ratio is closer to 1:1 then it should be fine. This recipe calls for 3.5 cups flour to 3 tsp gum. If you do not know the ratio (if you bought it premixed) you might need more and you might not. Brands vary so much from ingredients and use of gums. Hope that helps a little. 🙂
Can any of these recipes substitute baking powder for yeast? If so what would be the ratio?
I’ve have not tried baking without yeast for this specific recipe. I’m sure it could be done but the results will always be a little different than a yeast based bread. I have a yeast free Cinnamon Bun recipe which you can find here: https://petiteallergytreats.com/yeast-free-gluten-free-vegan-cinnamon/
can i substitute zanthum gum for the guar gum
Yes, guar and xanthan are usually interchangeable. 🙂
so, once they have boiled for 30 seconds per side, do you remove them from the water and put them back on those salted individual pieces of parchment? Do bake them on the parchment?
Thanks for commenting! The extra paper isn’t needed anymore and can just be placed in a parchment paper lined baking sheet.
Just made these today, and I love love love them! I’m planning on slicing and freezing to take with us on a little road trip. (There isn’t usually GF options for me when we travel to small cities.) They are so good they don’t even need anything smeared on them! YUM! Thanks for the great recipe!
So glad you like them Erin! Thanks so much!
These sound delish! Have you ever tried to make them low carb as well? For example, how do you think almond or coconut flour would hold?
I have only attempted baking with coconut flour once, which ended in a big mess.?. Coconut absorbs too much liquid and needs a very strong binder and protein like egg to keep the texture correct. We cannot use almond or any nuts (we’re allergic). I think the result would be very dense but I would love to hear if you attempt using an almond flour. Thanks so much!
I’m thinking I’m going to try your awesome recipe with Otto’s cassava flour which is typically a one to one sub for wheat. I’m grain free but coconut and almond wouldn’t work IMO. I’ve gotta try this looks amazing and is egg free to boot! Wooooo hooooo!
Are the oil and salt really necessary? I am trying an SOS (no salt no sugar no oil) vegan lifestyle
Hi Roxanne, You can always omit the salt and oil if you cannot eat them. The taste will be altered and possibly a little dry. You could always use some spices to add some flavor. Hope that helps!
What kind of yest?
Active dry? Rapid? Please give specifics as I am not a baker.. lol
Any yeast would work but I tend to use the rapid rise since it’s faster! 😀
I spent an hour and a half making these tonight and was so sad that they turned out completely dense, uncooked, hardly rose, and took about 21 minutes to brown. I used nonfat milk as my liquid, and pamela’s artisanal gf flour, xanthan gum, and canola oil. The yeast that I used was Fleischmann’s Active dry yeast. Any ideas what went wrong? GF bagels are my fav breakfast, and I love Udi’s, but they’re pricey and pretty high cal, and I’d love to be able to make my own.
So sorry to hear the results were less than perfect! I think the problem could be the gluten free flour… All mixes vary greatly and the lack of browning usually means a high starch ratio is used. The gluten free flour mix I use has a lower starch to whole ratio. Ready mixes usually contain higher amounts of xanthan gums. Did you add extra gum to mix as well? Dense baked goods could mean not enough liquid was used, the mix contains too much gum or the flour mixture contains too much whole grain (heavier flour) The yeast and oil sounds great. Temperature and rising time can affect overall rise of the finished bagel. I hope you will attempt this again since so many people have recreated this successfully and truly enjoy them.
Thank you so much for sharing this recipe! My son is 2 and is allergic to so many things (corn, wheat, soy, peanuts, tree nuts, and most of all eggs). I was so happy to finally bake a bread he can eat! He really liked it too! I can’t wait to try your other recipes as well! You’ve made my day!
So happy to hear this Lori! Glad your little guy can enjoy some bread his awesome mommy baked!
I tried this recipe twice, but had trouble getting the bagels to rise. I followed the directions, and used the ingredients recommended. The only problem I can think of, is if the place I set them to rise wasn’t warm enough. I have a separate wall oven, so when my oven is preheating, unfortunately my stove top does not warm (which is usually where I would have dough rise). Could this be what caused them not to rise? If so, have you ever let them rise in a warm oven? I was considering trying that, but wasn’t sure what temp would be a safe temp to have them rise at. Any suggestions?
Thanks so much! I’m very excited about all the recipes on your website! We too have multiple food allergies to work around 🙂
Hi Janny, rising times will always be variable due to differences in temperature. Watching the dough is the only real way to determine if they had enough time to rise. 15-20 minutes might not be long enough. To make things a bit more complicated, gluten free dough cannot be allowed to fully double in size or else it usually will collapse on itself. Here are few things you can do to help speed the rising process.
1. Preheat you oven to a very low temp (100 degrees would be ideal probably 220 is the lowest setting) for 2-3 minutes and turn it off. Place the tray inside and watch the dough rise-do not allow to over rise.
2. Bring a pot of water just to a boil on your stove top and turn off. Place the baking sheet directly on top. Again do not allow to over rise.
Both methods help warm the entire baking sheet. Just be careful the temperature isn’t too hot or else the yeast will die before fully cooking later. Hope this helps!
Delicious! I followed the directions exactly and they were great! Thank you!!!!
Hi, I tried out this recipe for the first time but had less than perfect results (i also forgot the oil, oops!) 🙁 they turned out really crunchy on the outside and I don’t think I’ll be able to feed them to my toddler because of it. Do yours normally have a softish crust?
Hi Christine, the crust will be crisper (like a real bagel) but not too crunchy. The oil will help with that and if you can use a higher in fat milk of choice it will be softer too. Practice makes perfect…I would try the hamburger buns since they’re soft and no boiling is required (bagels are more work). Hope that helps!
I have tried the bagel recipe twice now and while the flavor is wonderful, they have turned our gummy inside both times. I decreased my boiling time the second time and made the bagels smaller, but they are still gummy. I am using your flour recipe and following the directions. I know the oven temp is accurate as I have a thermometer in there. Any suggestions? Which type of milk do you typically use? I used water the first time and whole milk the second.
Thank you!
Gillian, hmm… Mine have never turned out gummy in the centers. Is the hole large enough (did not collapse or stick together after rising) so the water can drain out before baking? That is the only think I can think of (besides not cooking long enough) that would make them gummy. Next time use a thermometer to make sure the indide reaches 190-200F temp and make the hole larger so they don’t touch. Hope that helps!
You noted to add sugar, but I don’t see it on
The list of ingredients.
Nevermind! I’m blind. Sorry for that!
I totally share your love for bagels! My kiddo is allergic to peanuts and eggs. I’m wondering what oil you use/can be used. Most olive oils contain peanut oil, and while the reaction-rate is low, my LO is only 10 months, so I’d rather not chance it. I’ve had luck with coconut oil. Thoughts?
Hi Mrs. Smitty, We use avocado oil or regular canola. We’ve had problems in the past with olive oil, and your comment makes me think it was due to cross- contamination. Basically, you could use any oil just make sure it is in liquid form for the recipe. Even regular dairy butter would work. Hope that helps!
I just made these for the first time and they are AWESOME!!! My sons and I rarely get to have treats such as these, and they were pretty easy to make. Like anything else, speed will come with practice and frequency. I sprinkled some with sesame seeds and some with a dairy-free cheese, and some simply with salt. They all look amazingly perfect. Thank you so much for the recipe!
So happy to hear this Mary! Bagels are a staple around here especially since they freeze well. The work is well worth it in the end when it puts a smile on their face! If you can do bagels, go the for the new blueberry cinnamon rolls! Thanks so much!
So the individual wax papers go in the boiling water attached to the bagels?
Yep. The parchment paper (NOT wax paper- it will stick) goes in the water and peels away after boiling a few seconds.
I made these and they came out great. Just wanted to know the nutritional info, sorry if it was posted but I haven’t seen it.
Thank you! ?
Hi Carla, I do not have the nutritional values… It all depends on the gluten free flour used and type of oil and dairy-free milk you choose. This is partly why I do not calculate those values on the blog, people will always be substituting.
Hey there,
I just made these bagels, and I had a couple of issues with them that I was wondering if you could help me with.
The bagels did not rise, and were dense and doughy in the middle, while the outside was golden brown.
I have a couple of theories as to why they went wrong:
1. I used a temperature thermometer instead of a baking thermometer. It said that the water temp. was at 104 degrees, so I went with it. However, maybe the thermometer I used wouldn’t detect water temperature very well?
2. I used Bob’s Red Mill Gluten Free Baking Flour, which has the following ingredients: Sweet White Rice Flour, Whole Grain Brown Rice Flour, Potato Starch, Whole Grain Sweet White Sorghum Flour, Tapioca Flour, Xanthan Gum. I then added the 3 tsp. of xanthan gum as well.
Other than these two things, I followed the instructions. Any thoughts on why they didn’t rise properly?
Hi Lacy, Thank you for such a detailed trial of the bagels (love the numbered questions)! This greatly helps to problem solve…
1.The a baking thermometer is ideal since you can test the bread after baking to ensure things are cooked all the way through 190-200 degrees F is considered done for gluten free breads.
2. This baking mix already has Gum added. One thing to keep in mind for all gluten free baking (not just my recipes) if the recipe calls for gum but you mix already *has* gum, you do NOT need to add more.
Ultimately the gum in the mix combined with more gum suggested in my recipe caused the to fail. The dough was too tight. Gluten free doughs need gum to bind but has a limit since it still needs to be elastic enough to stretch for expansion during rising. The mix you used should work well enough in this recipe without any gum. Hope you try again soon!
What would be the adjustments to this recipe for High Altitude baking?
Hi Elaine, honestly I don’t know how gluten free doughs react to altitude…Sorry. I think a quick Google search for baking tips in high altitude baking could help.
hi, I haven’t tried the recipe yet but I’m very excited to. I don’t keep gluten free so I was wondering if the recipe would work with regular all purpose flour. and if I do use regular flour would I need the gum still?
Bri- Yes, you can always use regular wheat based flour for any gluten free recipe and leave out the gums.
Thank you! These are so yummy. I made bagels (gluten-y) once before C.D. and swore I would never do it again. You’re recipe is easy and delicious! It’s even vegan which is a transition I’m trying to make.
I made it exactly according to your recipe but added baking soda to the boiling water, hoping for pretzel-like outcome. I’m blown away!
Hey Laura!
These look amazing! I would love to try them except I am also sugar free 🙁 would it affect the recipe if i left out the sugar?
Also where do you get your guar gum?
Thanks!
Feel free to leave the sugar out (it’s just to help start the yeast). Be sure to add little gluten free flour in place of the yeast to help activate it. I buy my guar through my local grocery store but use xanthan if you have that and can tolerate it.
I made the recipe exactly as it said but had such a runny batter. I don’t know what could have possibly gone wrong. I added 3/4 cup extra flour (used the bob’s red mill gf AP) but eventually stopped because i didn’t want to ruin it even more. I don’t want to waste money on the flour again remaking the recipe. Any suggestions of this happening to anyone else? Was I supposed to let the dough rise before shaping them?
I made these this afternoon, I can’t use dairy, yeast or sugar so I was worried this wasn’t going to work. I used 1T maple syrup in place of sugar and 1 1/4 tsp lemon juice and 1 1/4 tsp baking soda instead of yeast. And oat milk as my milk. They didn’t rise a ton, but they came out otherwise PERFECT. I topped them with everything but the bagel seasoning from Trader Joe’s. I’m so happy to have bread again!!!!!!! Thanks for an awesome recipe
Awesome! Thanks so much for sharing!
Hi Laura,
I placed this inquiry on the flour recipe page, but it occurred to me that I should post this on the Bagel recipe page. Sorry for asking this twice.
I love that you give so many details. My daughter is GF. Her favorite breakfast is bagels and we have not found a commercial GF bagel that taste close enough to the gluten variety. I would love to make your Home Made GF Bagels. I followed the link to get the ‘gluten free all purpose white blend .’
Please be so kind as to specify for me which recipe do I follow for the bagels. Is it the Gluten Free Whole Grain White Flour Hybrid, Whole Grain Gluten Free Flour Mix, or the Basic White Gluten Free Flour.
I think its the last one but I want to be sure.
Thank you for your assistance.
Nancy
Hi Nancy,
You are correct with the gluten free All Purpose White Blend. It would also work with the hybrid blend. I hope your daughter likes these compared to commercial GF bagels… We have not tried any ready made ones due to egg, soy and sesame allergies on top of wheat.
What “liquid” are you referring to in the instructions? I’ve never made bread before, let alone GF bread so any tips will help!
The dairy free milk or water and oil are the liquids mentioned in the recipe. Hope that helps!